Hey Guys,
So I've been super busy this year with cosplaying and so I thought I would let you all know what I'm planning on working on at the moment.
So I've decided to cosplay as Hanamaru Kunikida from the popular Anime Love Live Sunshine! but I am making her Cheerleader costume from the Love Live game, love live school idol festival (LLSIF). (If you guys aren't familiar with LLSIF it is a popular rhythm game, I love it personally)
Moving on, so here is a pic of the costume:

So I thought I might as well write a guide to how i made this cosplay as I go so,


So I've been super busy this year with cosplaying and so I thought I would let you all know what I'm planning on working on at the moment.
So I've decided to cosplay as Hanamaru Kunikida from the popular Anime Love Live Sunshine! but I am making her Cheerleader costume from the Love Live game, love live school idol festival (LLSIF). (If you guys aren't familiar with LLSIF it is a popular rhythm game, I love it personally)
Moving on, so here is a pic of the costume:

So I normally use patterns when I make my cosplays as I haven't had much experience (or any) making my own patterns but I couldn't find any patterns that were anything like either the skirt of the top (well that weren't on amazon and wouldn't cost me over $25 dollars including shipping :/).
So I have ended up having to make my own pattern.
First off I decided on the best material, I am going to be using Pique in fluro green, fluro pink, white and gold. It is similar to broadcloth and is extremely reasonably priced but it has some properties od spandex and Lycra which are expensive especially for a student like me.
So I thought I might as well write a guide to how i made this cosplay as I go so,
You will need:
- 1m green/fluro green Pique (or spandex or what ever fabric you are using)
- 1m pink/fluro pink Pique
- 1.5m gold Pique
-2.5m white pique
- Iron on Interfacing
- Heat transfer paper and the flower and stars pattern (I made mine on photoshop and I will see if i can upload it in a later post as well as my pattern for the school idol festival logo on her shirt)
- 18cm Zip (I'm using 18cm but you can use a different length)
So lets start with the skirt (I haven't made me final skirt yet but I have made my mock up out of muslin and it fits perfect)
Measure your waist and decide how long you want your skirt to be.
My waist is 73.66cm or 74cm (29") and I want my skirt length to be roughly 40cm (16")
so I am going to take my waist measurement and divide it by the number of panels/pleats that I want my skirt to have which is 8.
So we now have 9.25 now we add a 2cm seam allowance. So my panel widths/pleat widths are going to be 12.25cm or 4.8".
Next step is to cut out our pattern pieces:
1. Cut out 7 panels of your dominant colour (in this case white) in the dimensions determined above so I cut mine out 12.25cm by 40cm.
2. Cut out 8 panels of your flash colour (or non-dominant colour) which is green in the same dimensions as the 7 you cut out in the dominant colour (12.25cm by 40cm for me)
3. a. for the back panel with the zip add 2.5cm or 1" to your normal panel width (I end up with 14.8cm)
3. b. Cut 1 panel out of your dominant colour (white) by the dimensions 14.8cm by 40cm
3. c. Cut wide panel in half so your dimensions will now be 7.4cm by 40cm
4. a. From your dominant colour (white) cut your waistband strip. Add 7.6cm (3") to your waist measurement. The width of your waistband will be 10.2cm (4"). Dimensions are for me 81.62cm by 10.2cm
4. b. from interfacing cut 1 piece by the length of your waist + 7.6cm or 3" and by half of the width of your actual waistband. So my dimensions will be 81.62cm by 5.1cm (2")
Next step: Sew together
1. take one of the narrow panels of your dominant colour (see 3 in pattern cutting) and with right sides together pin to 1 panel of your 8 flash colour panels and sew along the length of the 2 panels.
2. sew all the panels together - alternating between dominant and flash colour panels, ending with the narrower dominant colour panels on each end. You should end up with one long strip.
Looking something like this (in different colours and with more panels of course):

Before moving on to the next step make sure to measure the length of all the panels connected together. You Will Need this measurement when making the scalloped underskirt.
Next Step: Making the pleats
1. pinch the non-dominant colour together so it isn't visible and pin. if that isn't completely clear; bring together the 2 top edges of 2 dominant coloured panels and fold the non dominant colour underneath and pin in place
reference pic:
(front)

(back)

2. Iron the dominant panels flat and together
should look like this:
(front)

(back)

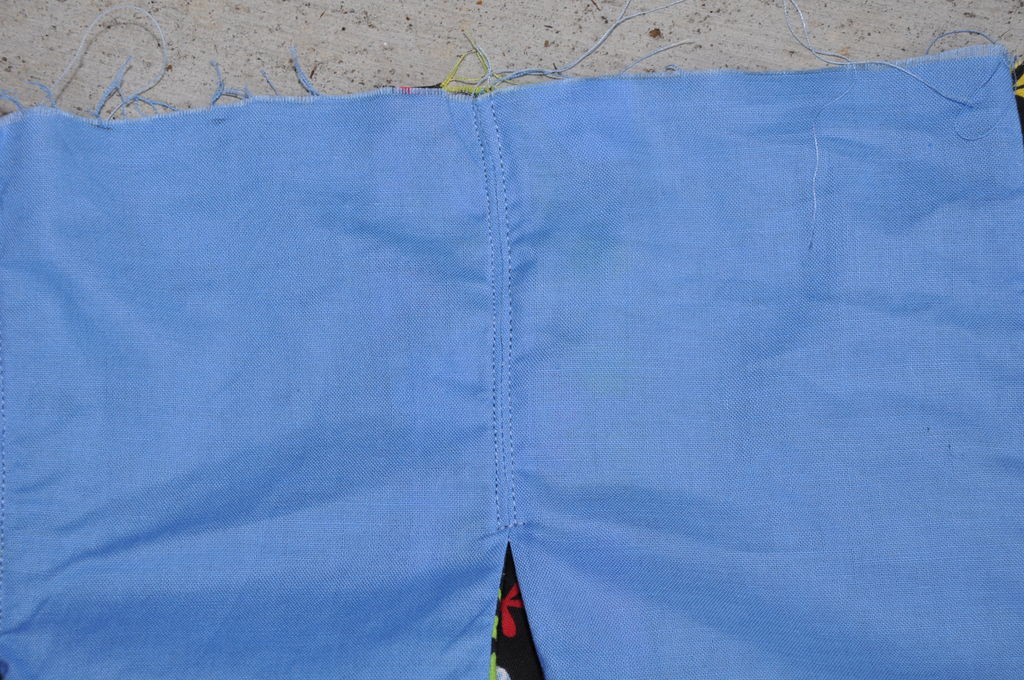
3. sew each dominant coloured panel to the one next to it. (sew parallel to the waist edge of the skirt over the top of the pleat where you have pinned the 2 dominant pieces together)
4. sew vertically down 1.5cm from the top of skirt on each side of where the 2 dominant panels meet at the top of the pleat (at the waist). Make sure not to sew too far down though as this stitching needs to be hidden by the waistband..
reference pic:
So this is where I am going to stop for this post. The next steps are to pattern and cut the yellow underskirt and to attach the waistband. (Note: can't attach the waistband until the yellow/gold underskirt is made).
So until next time,
Becca
Little Patchwork Fox Cosplay
(also please note that the reference pictures that I have included in this tutorial are not my actual mock up skirt, I forgot to take pics of mine as i went along so as i was writing this tutorial I found some pics that showed what i was trying to say. Link to where I got the pics: http://www.instructables.com/id/Little-Girls-Cheerleading-Skirt/?ALLSTEPS. Credit to the person who made the skirt in the pictures i have used)